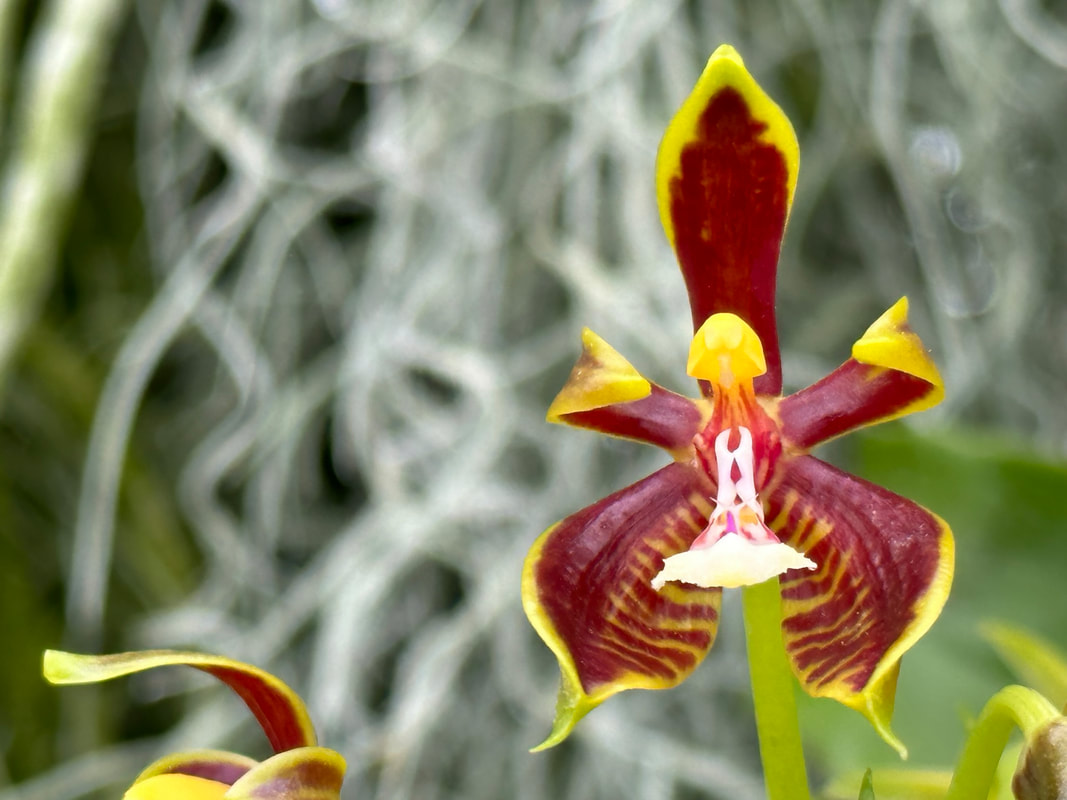
 The iPhone 13/14 introduces an enhanced macro photography function that allows users to capture stunning close-up shots of small subjects with incredible detail and clarity. Leveraging advanced camera technology, the macro mode on the iPhone 13/14 camera enables users to explore the miniature world around them and capture intricate details that may not be visible to the naked eye. Dedicated Macro Lens: The iPhone incorporates a specialized macro lens designed specifically for close-up photography. This lens enables users to focus on subjects at an extremely close distance, typically ranging from a few millimeters to a few centimeters away. The dedicated lens ensures optimal clarity and sharpness in macro shots. Autofocus and Focus Stacking: The macro mode on the iPhone camera includes advanced autofocus capabilities to ensure that the subject is sharply focused. With the help of focus stacking technology, the camera captures multiple images at different focus distances and combines them to create a final image with a wider depth of field. This technique ensures that a greater portion of the subject remains in focus, even with the shallow depth of field typically associated with macro photography. Improved Image Processing: The iPhone leverages its powerful image processing capabilities to enhance the quality of macro shots. The camera's computational photography algorithms work in tandem with the dedicated macro lens to optimize sharpness, color accuracy, and dynamic range. This results in vibrant and detailed macro images with accurate colors and minimal noise. Macro Lighting: Adequate lighting is crucial for macro photography. The iPhone camera incorporates enhanced macro lighting features to ensure well-lit and evenly illuminated macro shots. The camera may utilize the device's built-in flash or adapt to ambient lighting conditions, intelligently adjusting exposure and white balance to provide optimal lighting for close-up subjects. Macro Photography Tips: To maximize the potential of the macro photography function on the iPhone, consider the following tips: a. Stability: Due to the close-proximity to the subject, even the slightest movements can result in blurriness. It's advisable to use a tripod or stabilize your iPhone when capturing macro shots. b. Composition: Pay attention to the composition of your macro shots. Explore different angles, perspectives, and framing options to highlight the unique details and textures of your subject. By the way, this is one of the principals of mindful photography. c. Lighting Control: Experiment with lighting conditions to create different moods and effects in your macro images. Consider using natural light, diffusers, or additional lighting sources to achieve desired results. d. Manual Adjustments: The iPhone may provide manual controls or settings for macro photography. Explore these options to fine-tune exposure, focus, and other parameters for optimal results. In summary, the macro photography function on the iPhone empowers users to capture incredible close-up shots with exceptional detail and clarity. With a dedicated macro lens, advanced autofocus, image processing capabilities, and optimized lighting, the iPhone enables users to explore and document the fascinating world of tiny subjects with ease and creativity. PS: In full disclosure, much of this article was written by ChatGPT. I am undecided whether this is a good thing or not. 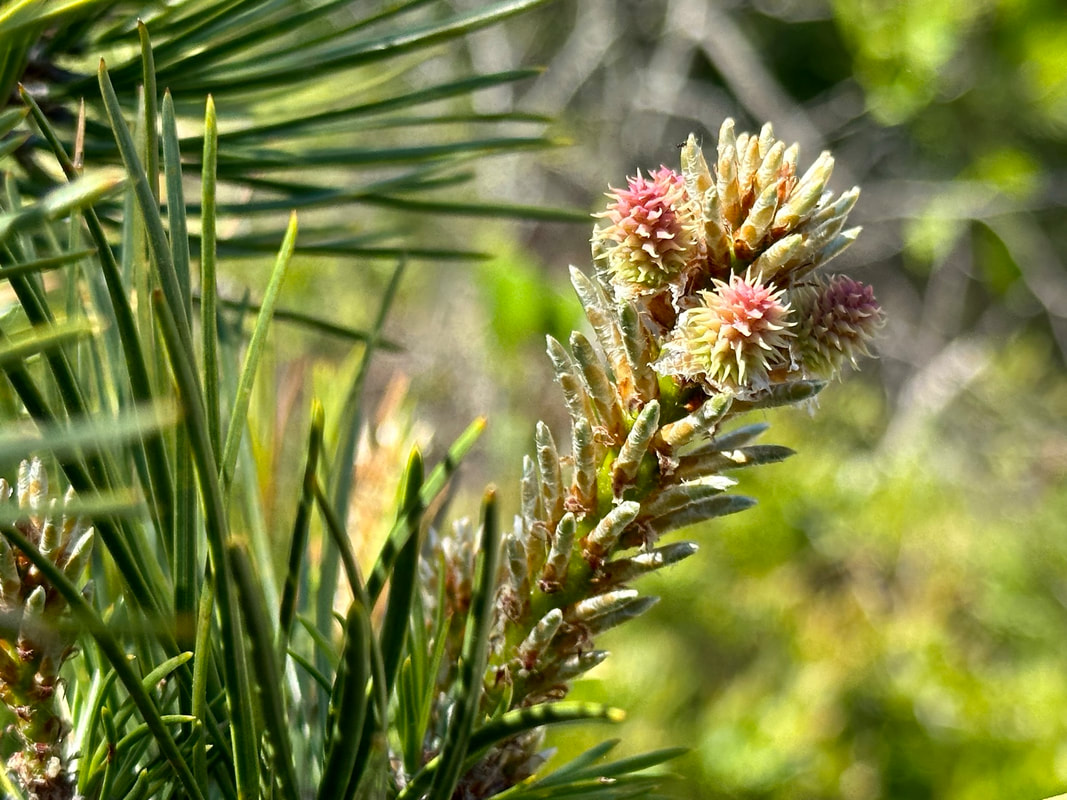
0 Comments
One of the challenges in photography is shooting in low light situations. How do you take creative and beautiful photographs in museums, concerts, gymnasiums, restaurants or other places where you don't have (or don't want) a tripod and using a flash is not permitted? Let me introduce you to the "ISO Escalator" technique. To my knowledge, this is a term that I coined a few years ago when I began to teach students how to leverage ISO to handle low light photography. If you want to learn more about ISO in general, review ISO Settings in Digital Photography, Digital Photography School. 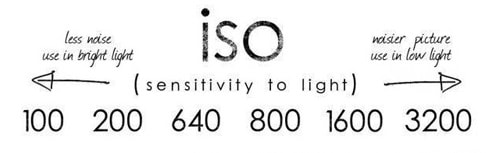 One note on using Flash in low light situations. Don't! Flash kills the mood, may not be permitted and will annoy everyone around you. Also, please turn off Auto ISO. The concept for the ISO Escalator is to determine the slowest shutter speed that you need for your shots, and yet be fast enough to avoid shaky/blurring pictures. Then determine what the best ISO to use, based on a room or space that is perhaps the darkest situation you plan to shoot at. Imagine being in restaurant with just the ambient lights turned low for a nice mood. That is most likely your average or worst case lighting. In a Gallery or a Museum, one of the rooms where there may not be ambient light from outside windows. Once you determine the correct ISO, you should be able to shoot in the space (and adjoining rooms) without thinking about anything but your composition. In our workshops, we teach that it is important to keep photography fun. This technique allows you to have fun, while knowing your photos are likely to come out looking nice, without the typical blur-shakiness we have all experienced. This is an example of using the ISO Escalator in a reptile room at a Zoo. 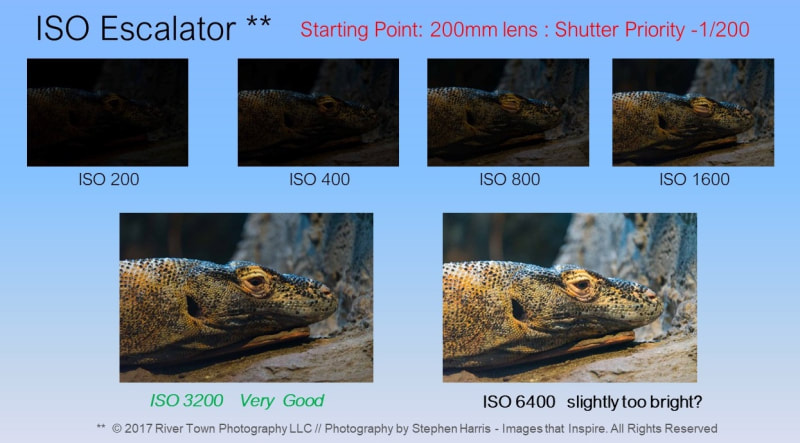
Let's get started:
In the example above in the reptile room. I was using a 200mm lens, so I set my shutter to 1/200th - and worked my way up the escalator (now you know why I call it the ISO Escalator). At 3200, the subject looked well lite. I went one more stop (ISO 6400) and thought it was too bright, so I reset my ISO back to 1600 - and focused on composing pictures in this darkened room. Recap: Try it yourself in your dining room or other interior space, with the lights dimmed.
Let me know if this simple technique has helped you to improve your low light photography. |
|
© 2024 River Town Creative, LLC - All Rights Reserved
|